This is NOT an official AirScout help screen setup. Hopefully it will get you going ok however.
Today 30/9/2020 I have just downloaded AirScout Version 1_3_3_5 which fixes some bugs, so will be interesting to see how it goes. This is a fabulous program for seeing Aircraft Enhancement (AE) signals particularly on the higher Ham bands.
If you have a radio waterfall display like SpectrumLab, have a look for the doppler shifted traces on strong beacon AE signals. Awesome!
During Covid19 lockdown and with few airplanes, it has become most evident that AE has played a bigger role in VHF Dx contacts when there has been little or no Tropo around to help.
There are four parts to this setup:
1. Initial basic parameters and first run.
2. Adjust specific parameters in menu tabs.
3. Select Callsigns for Multi Screen.
4. Make a desktop shortcut Icon
RUNNING AIRSCOUT FOR THE FIRST TIME
Download the software ZIP file and I suggest moving it to C:/user/your name directory
When it is unzipped it will make its own directory there.
After unzipping the software, go to the directory, find airscout.exe and double click and run it.
Windows Defender may say NO! but select more and run anyway.
(I have scanned the AirScout directory with McAfee and seems clean)
First you will be presented with the usual Terms and Conditions
You may Accept and Next to continue.
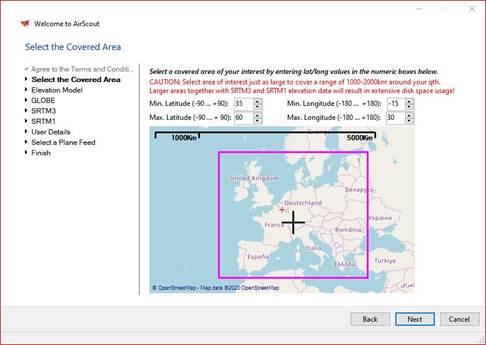
You will then be presented with the Welcome screen so now modify your area parameters for Australia/ZL (or yours) with the numbers in the next picture.
Min Lat = -48 / Max Lat = -10 / Min Long = 110 / Max Long = 179
Note: if the area looks elongated please re-enter the Min Long again.
Up/Down keys work here.
It should look like the next picture.
Enter the NEXT/OK
GLOBE DATA
The GLOBE map is default but you select STRM3 later. STRM1 took ages to download and did not seem to work for me.
You should see the map downloading the Globe data and then filling the map.
NEXT
Next is your user details Callsign and Coordinates
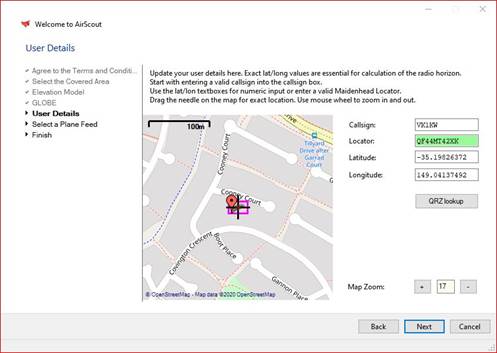
The software will pick your co-ordinates from your locator entry but they may not be accurate so on the map zoom out and move your little red locater to the correct position. Zoom in and check.
NEXT
PLANE FEEDS
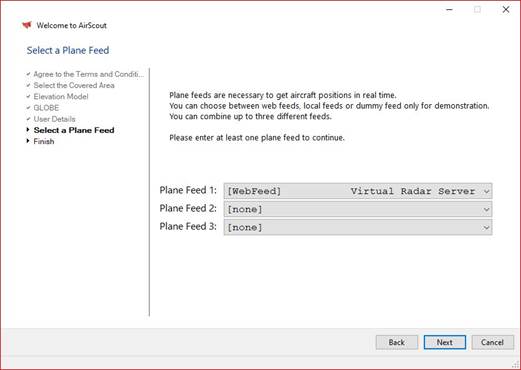
So look at the pull down menus and replace the Virtual Radar Server in Settings with
http://aussieadsb.com/VirtualRadar/AircraftList.json? You may need to register and add user name and PW to Settings.
NEXT
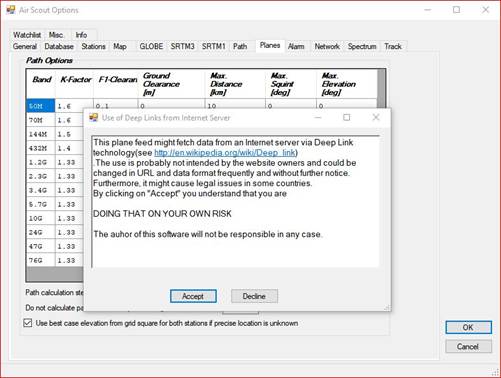
Accept (Decline)?
NEXT
FINISH
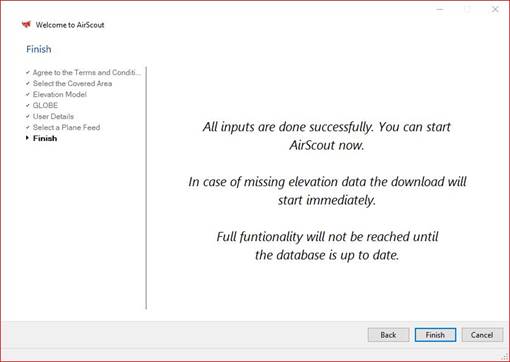
OK it is now good to run.
Give it a run using the green arrow bottom right of the display.
It will be doing stuff for a while and the next step is to fix the display.
There are several more tick boxes to update yet and it wont look good, so stop with the II stop icon bottom right.
Select OPTIONS
Select General Tab - looks ok yeh?
Select Database - nothing to do here!
STATIONS
Select Stations - needs some work here. Enter your callsign left and one other on the right.
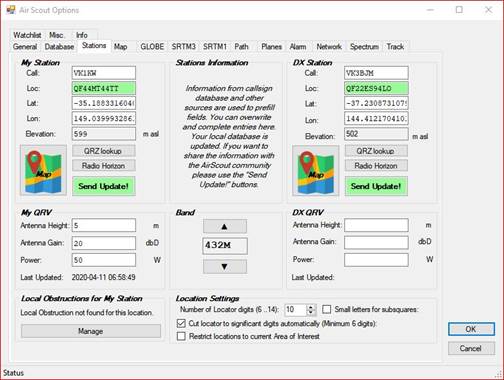
You can also fill in the Station info here if you wish as it is used to calculate correct propagation paths. Nothing else needs to change here.
You may adjust the station position here also by clicking on the flags and moving the marker.
Enter OK
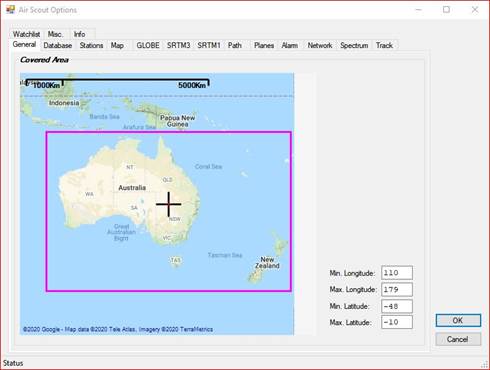
Go back to OPTIONS
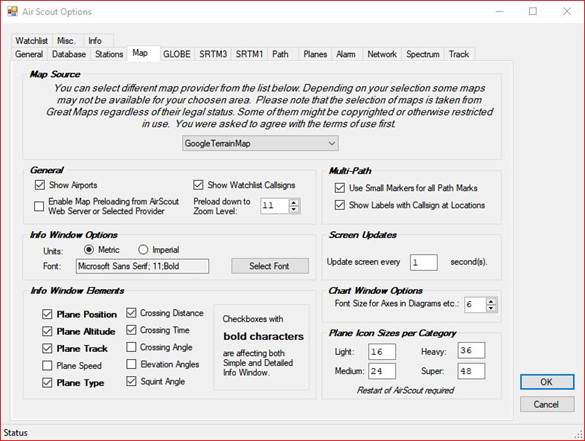
Select MAP
Some tick boxes here but the only one to change is the pulldown menu.
You will get Accept (Decline)?
I selected Google Terrain Map
Select OK.
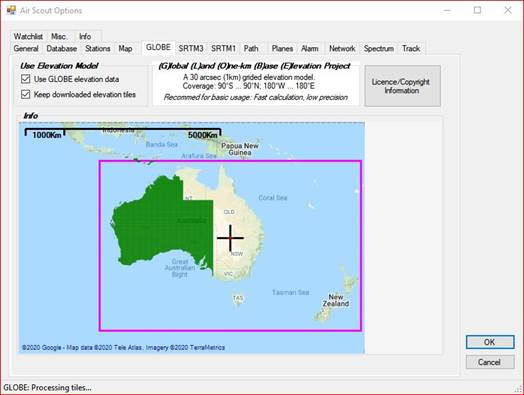
Go back to OPTIONS
Select GLOBE and watch it fill - the two tick boxes are ticked.
When finished, OK.
Go back to OPTIONS
Select SRTM3
Tick both boxes.
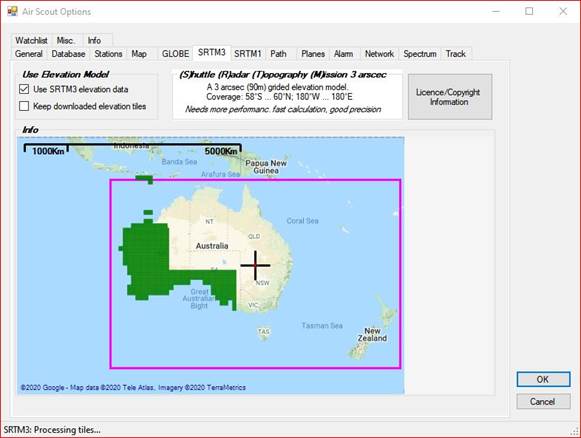
Wait until it fills.
When finished, OK.
Go back to OPTIONS
Select SRTM1
UNTICK both boxes - play with this later as it is a huge file of precise height data and may not work for you.
When finished go OK.
Have a look later maybe?
Nothing to do in PLANES
Have a look later maybe?
Tabs - ALARM - NETWORK - SPECTRUM something to play with later.
The alarm triggers when a plane is in range of the track path.
Go to TRACK tab
Tick the box Active Antenna Tracking
Enter OK.
This will put Azimuth and Elevation dials on your display when you select a plane of interest.
It is not necessary to change anything else here unless you want to drive an antenna.
ALL DONE - ALMOST!
Give it another run with the green arrow.
That should look better!!
Wait until the little boxes fill down the bottom right under the start/stop icon.
It should be downloading Globe and SRTM3 data again. (awfully slow)
Note: in Single display mode you may not see any planes unless they are in the selected track area. There is a tick box for that to see all.
Now for MULTI Mode
Select STOP II icon
Select Multi Tab top right.
Not Much there at the moment. Only you and the original.
Select Manage Watch List at the bottom of the list or in the Options Tab if you are there.
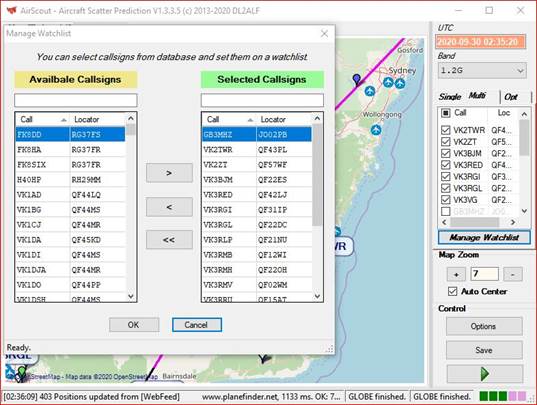
Add the required callsigns to the watch list and remove unwanted ones.
I think all these come from the previously sent AirScout user list from earlier versions.
When done select OK
Tick the ones on the righthand list that you want to display on the track screen.
Run AirScout again with the green arrow and check the list.
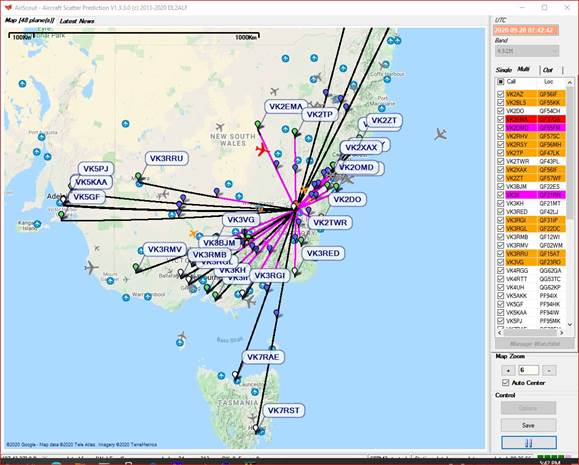
Some callsigns may be greyed out due to the 1000Km range limit that you may modify later.
That is IT.
You may go back and modify the content of the tabs but take note of what you have changed.
SCREEN Shortcut ICON
You may wish to add a windows Short Cut Icon to your Desktop.
Find AirScout.exe in the AirScout directory.
Right Mouse click on it.
Select Send To from the list.
Select Desktop (create shortcut)
Find the AirScout Icon on the desktop and modify the name and position as required. Do a screen refresh (Right Mouse on background)
GOOD LUCK
Vk1kw